Automatically Archiving RSS Items in Google Reader

Google Reader is ten kinds of awesome, and has enabled my problematic RSS addiction. It allows me to easily churn through hundreds of interesting news/blog items a day on a whole range of subjects. Increasingly, I find myself going back to find items I read weeks or months ago, and searching with Google Reader is generally easy. Like all Google products, it seems to save nearly everything you ever put into it, but in the case of Google Reader, not absolutely everything. The content of a given RSS entry, an XML file with inline images, is saved, but the images themselves (along with any other external content) are not preserved, only the reference to their remote location. This presents an issue of longevity, as a given image may not still exist when I call up a certain RSS entry at some point in the future.

In an attempt the create a more permanent archive, I’ve cobbled together a piece of embarrassingly poorly written code, so dumb and inefficient that I very seriously considered not posting it, if only to save face, which captures all of the RSS items I’ve marked “shared” in Google Reader, and emails them, with images attached, to my Gmail account. This serves to build an archive of the posts I find most interesting, with copies of the images they reference. To sum it up on one sentence, and for the sake of anyone searching for something to do this, this script performs an automatic backup of Google Reader, complete with images and the text of the RSS entries.


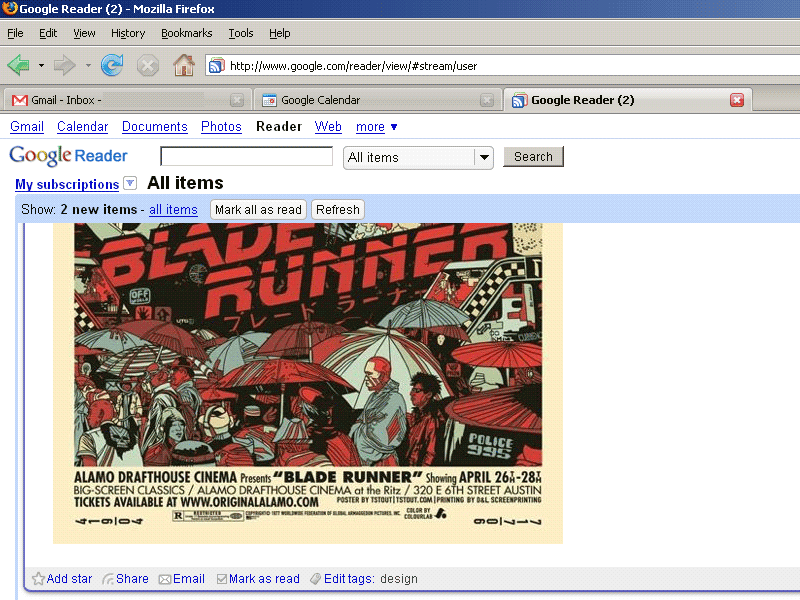
The first step is marking items in Google Reader as “shared.” This makes them public, and is a way of narrowing down a torrent of information to items which I want to save.
 
google reader


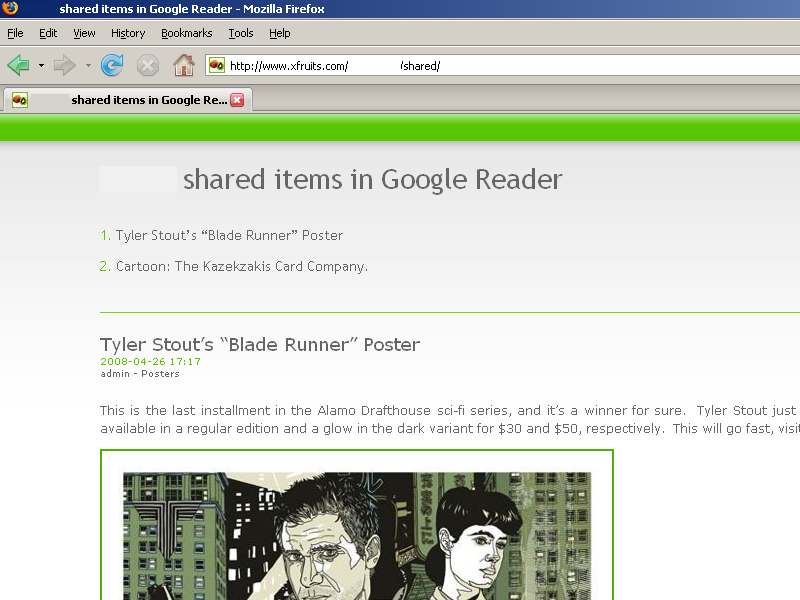
The resulting feed is passed to xfruits‘s RSS->mail tool, which transforms the feed into a digest.
 
xfruit


From there it gets slightly more convoluted. Using a PHP class I found called “PHP Text / HTML Email with Unlimited Attachments” I’ve written a script which sends me a copy of the xfruits digest, with images attached and inline. I’ve included these files below, and some comments on the code.
 

Aforementioned PHP hackjob: rss_backup.php
PHP HTML Email Class: class.Email.php


This snippet loads the class, and establishes the destination of the email


<?php
//** load email class definition.

  include('class.Email.php');  

//** establish to,from, and any other recipiants.

  $Sender = "";
  $Recipiant = "username@email.com";
  $Cc = "";
  $Bcc = "";


This uses wget to grab the HTML and images from the xfruits digest and place these files in one directory. Wget also rewrites the image links in the HTML so that they reference images stored in the same directory as the HTML file, this becomes important in displaying attached images in HTML email.


//** wget content

  echo "\n\n\n\n"."**** BEGIN WGET HERE ****"."\n\n";

  $foo = system('mkdir wget_dump');
  chdir('wget_dump');
  $foo = system('wget --span-hosts --convert-links --page-requisites 
			--no-directories http://www.xfruits.com/username/shared');

  echo "\n\n"."**** SO ENDS WGET ****"."\n\n\n\n";


//** read in the content

  $filename = "index.html";
  $handle = fopen($filename, "r");
  $contents = fread($handle, filesize($filename));
  fclose($handle);
  $orig_file = $contents;


This makes and checks the MD5 hash of the wgetted HTML and compares it to the HTML which was downloaded the last time the script was run. This is an attempt to prevent repeat emails, it's doesn't work perfectly at this time.


//** check if the content has changed since last run

  chdir('..');
  $filename = "rss_backup.txt";
  $handle = fopen($filename, "r");
  $old_hash = fread($handle, filesize($filename));
  fclose($handle);

  $hash = md5($orig_file);

  echo "**** HASH CHECK of index.html ****"."\n\n";

  echo "old hash: ".$old_hash."\n";
  echo "new hash: ".$hash."\n";


  if ( $old_hash == $hash ) {
  	$foo = system('rm -r wget_dump');
  	exit("\n"."no rss update at this time"."\n\n\n\n");
  }

  chdir('wget_dump');


This uses a regular expression to locate all of the images referenced in the HTML, and also rewrites these image links to include "cid:" so that something that read foo.jpg will now read cid:foo.jpg which is the syntax used in HTML emails when referencing attached images. I used the very very awesome RegExr to write the search expressions.


//** regex to extract image filenames and to rewrite the scr tags

  $pattern = '/[^"]+\.(jpg|jpeg|gif|png|tif|tiff|bmp)/i';
  $replace = 'cid:$0';
  preg_match_all($pattern, $contents, $matches);
  $contents = preg_replace($pattern, $replace, $contents);

  $maxcounter = count($matches[0]);
  $maxcounter = $maxcounter;


The rest of the code (and some from above) is largely pulled from the class example, it attaches and sends the email and does some cleanup.


//** create the HTML version of the body content here.

  $htmlVersion = $contents;
  unset($msg);

//** !!!! SEND AN HTML EMAIL w/ATTACHMENT !!!!
//** create the new message using the to, from, and email subject.

  $d = date('r');
  $msg = new Email($Recipiant, $Sender, "Google Reader Shared Items Backup for ".$d);
  $msg->Cc = $Cc;
  $msg->Bcc = $Bcc;

//** set the message to be text only and set the email content.

  $msg->TextOnly = false;
  $msg->Content = $htmlVersion;

//** attach any images to the email

  for ($i = 0; $i <= $maxcounter-1; $i++) {
  	$mime = "image/".$matches[1][$i];
  	$target_file = $matches[0][$i]; 
  	$msg->Attach($target_file, $mime);
  }

//** send the email message.

  $SendSuccess = $msg->Send();

//  echo "HTML email w/attachment was ",($SendSuccess ? "sent" : "not sent"), "<br>"/n;

  unset($msg);

//** do MD5 to prevent repeat emails

  chdir('..');	
  $myFile = "rss_backup.txt";
  $fh = fopen($myFile, 'w') or die("can't open file");
  fwrite($fh, $hash);
  fclose($fh);

//** clean up

  $foo = system('rm -r wget_dump');

?>


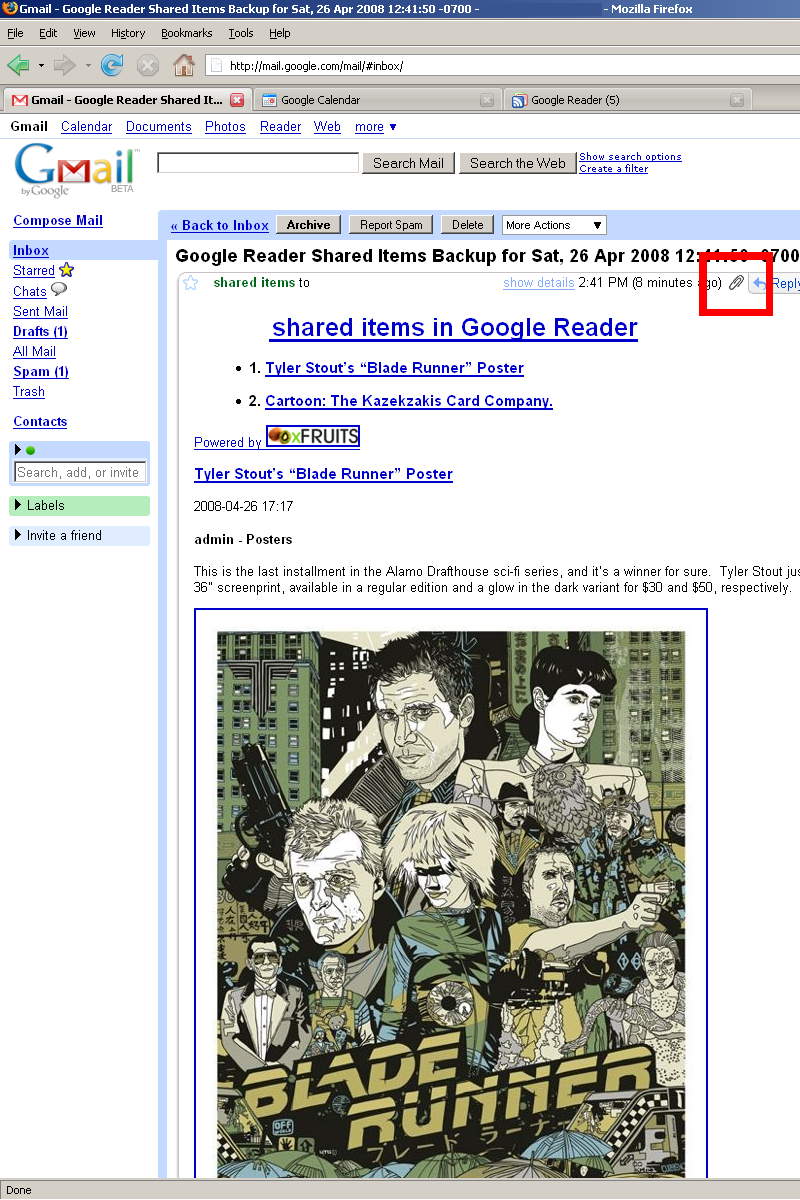
I've set up a cron job on my dreamhost account to run the script a couple of times a day. The result can be seen below, an HTML email containing attached images, displayed inline.

 
gmail

Software

Comments (0)

Permalink

Of Mozy, Ext3 and Truecrypt

I lost my trusty western digital 250gb the other day, the drive that served as the manually mirrored backup of my desktop. This wasn’t too big a deal, as the drive was just mirroring data and not archiving anything and because I’ve recently started using mozy as a backup solution. After using syncback and extra hard drives to prevent the data loss I so fear for the last couple of years, I’ve recently been investigating online backup solutions. This was prompted by the release of Amazon’s S3 service several months ago, which has depressed the price of such offerings. Of the half dozen services I’ve investigated, mozy stands out. It’s not perfect, you can’t manage multiple computers under a single paid account and there are still some rough edges and hilarious bugs in their software, but its unlimited storage is quite appealing (if you’re on a connection with a reasonable upload) and they offer good encryption options.

mozy1

mozy has a free version of their service with a capacity of 2gb and for 50usd a year you can upload as much as you can. The emphasis in the last sentence should be placed on “as much as you can” most residential high speed connections are skewed towards downstream, and many have very poor pstream, mozy seems to be banking on most people not having the patience to spend days uploading the gigs they presumably want to backup or that this restriction will keep people from abusing their “generosity.” I’ve pushed about 60gb to the service so far, which is about the amount of data I would be very upset about losing and everything has worked fine so far.

While my desktop, using the unlimited plan, hasn’t had any major problems, I ran into a stumbling block using mozy to backup my laptop. I’m using a Thinkpad t43 dual booting XP and Ubuntu thanks in large part to the excellent Thinkpad linux documentation available on Thinkwiki. As a result of the dual boot, the hard drive configuration is a little strange on the thinkpad.

gparted

sda6 is the volume that both the windows and ubuntu installations share access to, it’s formated in ext3, which windows can’t read or write to natively. That’s where the Ext2 Installable File System For Windows comes in. With this extension installed in windows, sda6 shows up as drive D.

d drive

Everyone is happy! The files on the D drive can be accessed by both the Ubuntu and Windows installations. Unfortunately, mozy can’t read the D drive, and therefore can’t backup it’s contents. This presents a real problem, as this setup is fairly ideal for getting work done on the thinkpad, but mozy isn’t likely to support a storage schema this obscure.

After some pondering I’ve come up with a solution I’m happy with. It occurred to me that anything on the Thinkpad that is worth backing up is also relatively sensitive data, so in an attempt to solve both problems at once we turn to truecrypt. A highly robust encryption package, truecrypt works with encrypted volumes that are mounted within either windows or linux systems. In other words, using truecrypt a file is created, the encrypted volume, which can then be mounted and unencrypted, so it appears as another hard drive. truecrypt is evidently more interoperable than the Ext2 File System because mozy recognizes a truecrypt mounted volume and can backup it’s contents.

So, after creating a truecrypt volume, called “truecryptfile” and storing it on the D drive (where both the Ubuntu and Windows installations will have access to it) we can mount it to the I drive. So even though the truecrypt volume is stored on the D drive, which mozy can’t read, when the truecrypt volume is mounted as the I drive, mozy can read it.

tcrypt1

i drive

Setting the volume to automount on boot will prompt for a password when starting the system.

tcrypt2

mozy can see the I drive! Success!

mozy2

This workaround is slightly strung together, using an extension of the windows file system to mount an ext3 volume and then using truecrypt to mount another volume, which is contained on the ext3 volume and then having mozy read off that. Despite the counterintuitive approach, everything on my laptop is encrypted, backed up and organized.

DIY

Comments (2)

Permalink

Canon SD400 LCD Repair

So, I abused the hell out of my camera. It rode in my back pocket as I stumbled through the last few months and I ended up smashing the screen on my Canon SD400 (sometimes known as the IXUS 50.) It was not the camera it once was. Note the dents, scratches and the fact that all the coloring around the optics is gone. Despite broken screen, I’m pretty happy with the amount of abuse it absorbed. The camera still worked and took pictures despite not having a working screen, but the optical viewfinder was all clogged with dirt and I was attempting to navigate the menus from memory and without feedback. It sucked.

Battle Damage

This was sad, so I started googling for the possibility of a user replaceable screen and while what I found certainly voids the warranty faster than throwing the camera under the wheels of a moving van, it worked. Nuts to you warranty.
Andy Ozment has a nice (if google adword covered) multi-model write-up about repairing the screens, but no pictures. I *guess* this is an understandable side-effect of writing a guide on repairing a camera, many people might find it tough to photograph the repair while trying to repair the object that would be used to take photographs. I am not one of those people. Oh, now is as good a time as any I guess:

Perform at your own risk. This shit WILL void your warranty, oh god don’t sue me

Here we go.

  • I got a new screen from Foto Geeks it came in a silly little box and seemed tiny for costing 65bux.
  • From reading on the internet I took a guess that my backlight was *NOT* broken, the chief indicator of its well being was the glow it gave off through the shattered screen, this is good. I don’t know where you can order a new backlight, but I’m pretty sure you could replace it in nearly the same method I use here
  • I used two Craftsman Professional screwdrivers, a flat head 3/32×2-1/2, and a philips 00×2-1/2. I love these screwdrivers ’cause I’m pretty sure you could prison stab someone with them and my Dad gave them to me. (thanks Dad)
  • You’ll also need Scotch Tape, a Post-it note and scissors.

First, remove the battery and memory card, I guess you should also be worried about static discharge frying the camera, but I did this repair whilst wearing socks on the carpet, I think you’ll be fine. I’m fairly sure that static electricity doesn’t really exist.

Here’s the unboxed replacement SD400 LCD screen. I tried to keep the new screen as dust free as possible so as not to trap any crud under it during installation. Determining the orientation is going to be important later, so notice that the screen has two distinct sides.

Replacement Screen

There are six screws on the exterior of the camera, REMOVE THEM!

Screws
Screws
Screws

When all the screws are out, pull the two overlapping halves of the camera apart, being careful as it is possible to bend the metal.

Crack Case
Crack Case

Parts that will fall out:

  • Silvery plastic circle thing.
  • Rectangular silver mount for the wrist strap
  • Buttons

Open

I did a powerup here to check that I hadn’t messed anything up at this point, and ’cause I didn’t have a picture of the screen in all it’s glory.
This may have been a shock risk or just stupid, I don’t know.

Open

At this point I installed an InvisibleSHIELD on the new screen while it was still outside the camera

Shield

Removal of screw number 7, this screw is a different size than the others, so don’t get it mixed up.

Screw7

This is one of the hardest parts of the whole procedure. The backlight and LCD are held together with a series of metal clips that have to be freed before you can replace the screen. I used a small flat head screwdriver to wedge in between the two and try to get the claps undone. This is also the part I have the worst pictures of. The goal is not to get the LCD off right now; it’s just to get it detached from the backlight.

Pry
Pry
Pry

When it comes loose, you’re going to want to slide it to the left before you lift it up like the pictures shows. There’s a few little catches that you don’t want to break off, but sliding the screen out a little bit before lifting should avoid this.

Screen
Screen

Flip the camera over and using the screwdriver, lift up the small black plastic gate holding the ribbon cable in, and pull it out.

Ribbon
Ribbon

Now comes the really unpleasant part. The ribbon cable is threaded through the internals of the camera, if you pull it free, it’ll be very hard to get the new cable back through. That’s where the tape and Post-its come in; you can use them to make yourself a little retrieval cable and pull both the ribbon cable and the post-it through. You can then use that same bit of paper to guide the new ribbon back through.
Make sure that the new screen is going on in the same orientation as the old one; there likely won’t be room to turn the ribbon over when you get it threaded.

Here’s the old screen with retrieval post-it attached and ready to go

Post-it

Now the old screen, ribbon, and post-it have been pulled through.

Post-it

Transfer of the post-it from the old screen to the new one, with the new screen in the correct orientation

Post-it

Threading of the new ribbon through the cameras internals, this would be quite hard without the post-it already in place as the path inside the camera goes up and down. Also consider applying tape to both sides of the ribbon/post-it interface to make sure nothing gets snagged inside the camera.

Post-it

When you have the ribbon cable back through, reseat it very deeply into the channel and lock the gate back down. Then give the camera a power on:

Winnar

Counter-Terrorists WIN!

Put it back together and do a little dance, that wasn’t so bad.

Winnar

(that’s a picture of my closet.)

DIY

Comments (94)

Permalink